How to Upload an Image in Open edX Studio Without Distortion: A Guide for Instructional Designers
Introduction
Images play a crucial role in online learning, enhancing engagement and helping illustrate complex concepts. In Open edX, a widely-used LMS platform, instructional designers can easily upload images to enrich their courses. However, a common issue arises when these images become distorted, either stretched or squished, across different screen sizes. This mishap can detract from the course’s professionalism and learning experience.
In this step-by-step guide, we will explore how to upload an image in Open edX Studio correctly and avoid this common pitfall. By following these instructions, you can ensure that your images display perfectly, regardless of the device or screen size. Let’s dive into how to master image uploads in Open edX Studio.
The Common Problem: Image Distortion

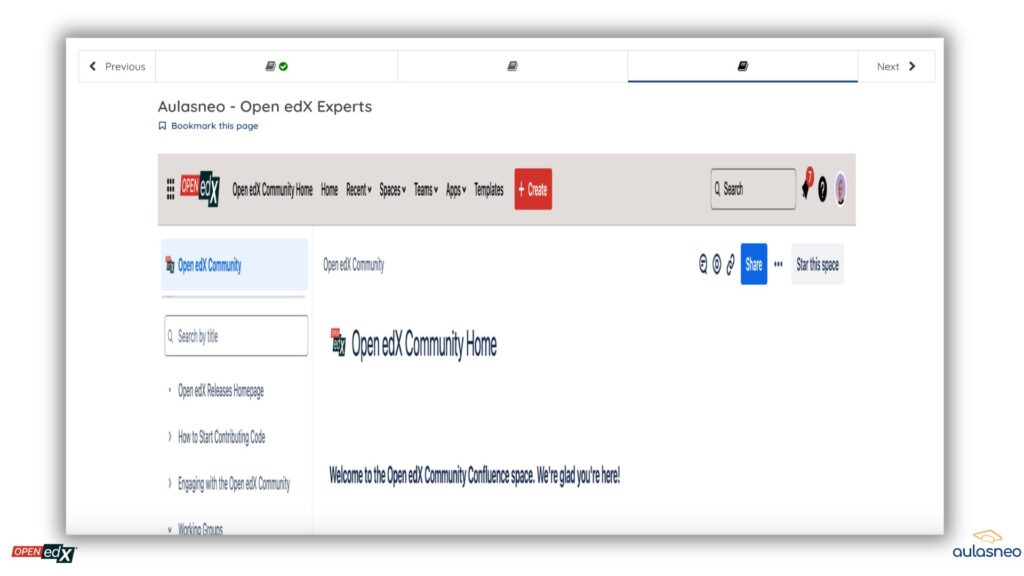
When using the WYSIWYG (What You See Is What You Get) editor in Open edX Studio to upload an image directly, it’s easy to encounter issues where the image appears stretched or squished. This happens because the WYSIWYG editor may not automatically handle image resizing for different screen sizes, leading to a less-than-ideal display on mobile devices or smaller screens. For instructional designers, this can mean a loss of visual appeal and a distraction for learners.
The key to solving this problem lies in the proper use of HTML code and Open edX Studio’s “Files & Uploads” feature.
Step-by-Step Guide to Upload an Image in Open edX Studio
Step 1: Preparing Your Image
Before uploading an image to Open edX Studio, it’s essential to prepare it for optimal display:
- Image Dimensions: Aim for an image width of around 800 pixels. This ensures a high-quality display on most screens without being too large.
- File Format: Use common formats like JPEG or PNG for the best compatibility.
- File Size: Keep the file size under 1MB to ensure fast loading times and avoid any performance issues for learners with slower internet connections.
Step 2: Uploading the Image to Files & Uploads
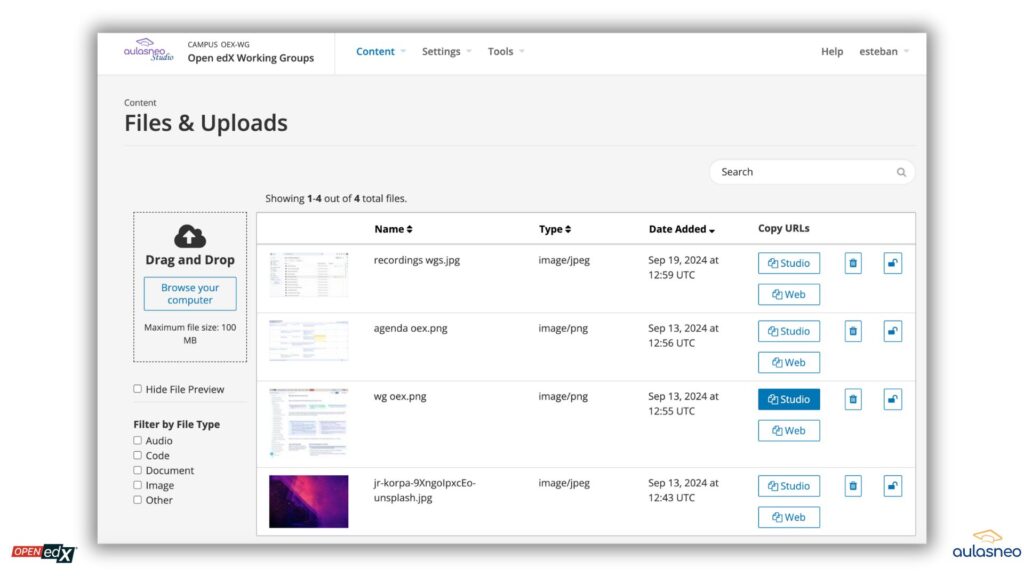
- Navigate to Files & Uploads: In your Open edX Studio course, go to the “Content” section and select “Files & Uploads.” This section allows you to upload and manage your course assets.
- Upload the Image: Click on the “Upload” button and select the image file from your computer. Once uploaded, you will see the image listed with a link.
- Copy the Image URL: After the upload is complete, click on the “Studio” icon next to the image. This will generate a URL for the image. Copy this URL as you will need it in the next step.

Step 3: Inserting the Image Using HTML
To ensure the image displays correctly across all screen sizes, you need to insert the image into the course content using HTML:

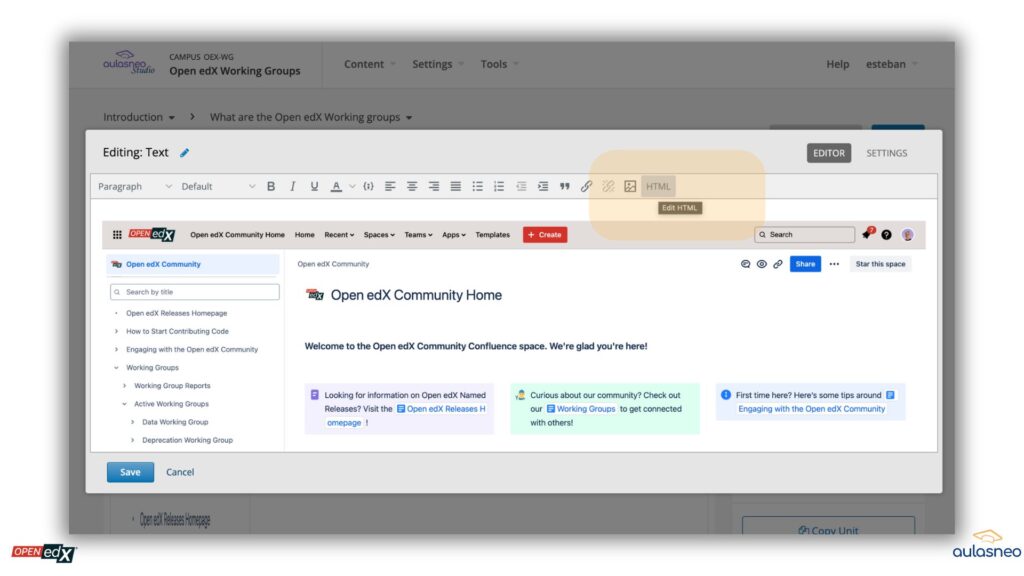
- Edit the Text Block in HTML: In the course unit where you want to insert the image, add a text component or edit an existing one. Click on the “HTML” button at the top right of the text editor to switch to HTML editing mode.
- Insert the HTML Code: Paste the following HTML code into the editor, replacing
/static/your-image-file.pngwith the URL you copied earlier:
<p style="text-align: center;">
   <a>
      <img src="/static/your-image-file.png" alt="aulasneo-openedx-experts" width="800" style="margin-left: auto; margin-right: auto;" class="center" />
   </a>
</p>-
src: Replace this with the URL of your image.alt: Add a brief description of the image. This is important for accessibility, ensuring that screen readers can describe the image to visually impaired learners.width: Set the width to800to maintain the desired size. You can adjust this number based on your needs.
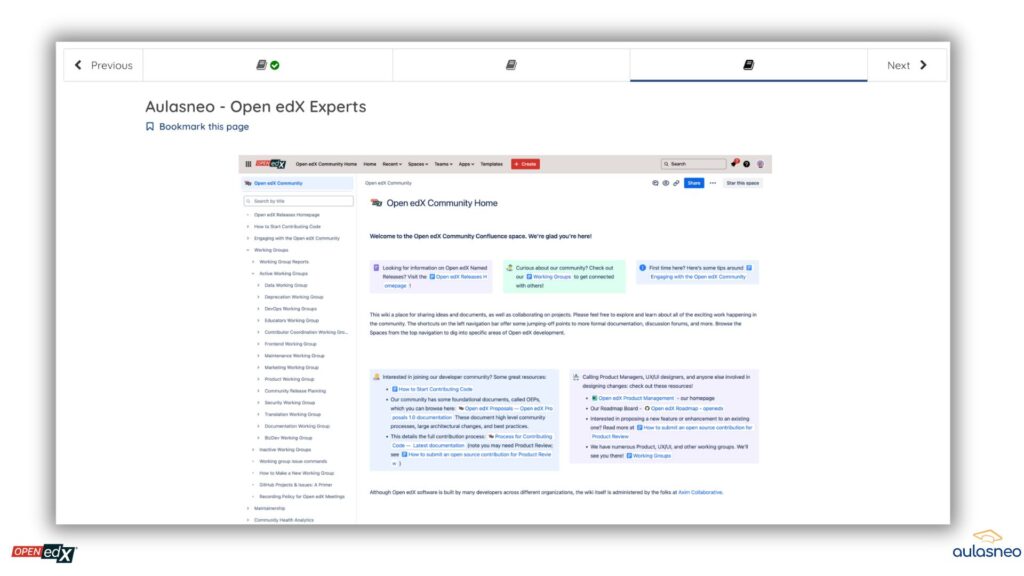
- Save the Changes: Click “Save” and then “Preview” to see how the image looks on different screen sizes. It should now display correctly without distortion.

Step 4: Preview and Test Across Devices
- Preview the Course: After inserting the image, use the “Preview” button in Open edX Studio to see how it looks on different screen sizes.
- Responsive Testing: Test the course on various devices, such as desktop, tablet, and mobile, to ensure the image scales appropriately. You can use your browser’s developer tools to simulate different screen sizes.
- Make Adjustments if Needed: If the image still appears distorted, you can adjust the
widthattribute in the HTML code or modify the image dimensions and re-upload it.
Why This Method Works
Using the “Files & Uploads” feature combined with HTML code ensures that the image is embedded into your course content in a way that allows for responsive design. This approach avoids the common pitfalls of the WYSIWYG editor, which may not handle image scaling and alignment as effectively.
By setting a specific width (e.g., 800 pixels) and centering the image using CSS (margin-left and margin-right set to auto), you maintain control over how the image is displayed. This method ensures the image retains its aspect ratio and scales properly on different screen sizes, providing a consistent learning experience for all users.
Additional Tips for Instructional Designers
- Use Consistent Image Sizes: Maintain consistency in image dimensions across your course. This creates a uniform look and feel, enhancing the overall learning experience.
- Leverage Alt Text for Accessibility: Always include descriptive alt text for images to support learners who use screen readers. This is not only an accessibility best practice but also improves your course’s SEO.
- Optimize Images for Performance: Large images can slow down page loading times, especially on mobile devices. Optimize images using tools like TinyPNG or ImageOptim before uploading them to Open edX Studio.
- Use High-Quality Images: While it’s essential to keep file sizes small, don’t compromise on image quality. Clear, high-quality images make your content more engaging and professional.
Conclusion
Uploading images in Open edX Studio can be tricky, especially when striving for a responsive design that looks good on all devices. By following this guide, you can avoid common pitfalls that lead to distorted images and ensure a visually appealing and professional course presentation.
Remember, instructional design is not just about the content but also about how that content is presented. Properly formatted images enhance the learning experience and contribute to a more engaging and effective online course. With Open edX and the right techniques, you can create a polished and impactful learning environment.
Need more tips and help to build your courses? Contact Aulasneo, we are Open edX experts and help organizations create and deliver online courses that stand out. Let us assist you in taking your instructional design to the next level.


